

Welcome to Education Corner!
This newly created section hopes to help educate store owners and their buyers on several topics:
1. How the products actually work and are they compatible with other products
2. How to satisfy common misconceptions
3. How to draw in and generate new customers
It’s been proven, that an informed salesperson will generate more sales than someone who knows little about the product. When the product’s packaging doesn’t tell the entire story, you need to. Access our informational library of PDFs to help educate you and your staff. GET EDUCATED and increase your bottom line… TODAY!

show through vs. bleed through
Many consumers confuse "Show Through" (also known as "Ghosting") and Bleed Through. This is one of the most common misconceptions customers have when it comes to highlighting and underlining in a Bible.
Since Bible paper is translucent, you faintly see what's on the opposite side. The image on the top left illustrates "Show Through". A single piece of Bible paper was placed over 5 blocks of color to simulate highlighting. The color shows through the page, but it's NOT bleeding through the page, this is called "Show Through" or "Ghosting".
The images underneath on the left are 3 examples of Bleed-Through. Bleed-Through is when ink saturates through to the opposite page and you can clearly see pooling ink on the backside of the page.
If your customer's Bible has very translucent paper and "Show Through" bothers them, we suggest they try a lighter color highlighter or underliner (yellows or pinks). Even though Zebrites & Microns are safe to use in the Bible if wet ink just isn't providing the desired result, we suggest an ACCU-Gel & Bible Dry highlighters.
GTL has a solid reputation for providing highlighters and underliners that don't bleed through Bible paper. Due to the many qualities of Bible paper, we suggest testing any writing instrument in an inconspicuous area of the Bible to determine satisfactory results.
**check out the downloadable flier for additional information**
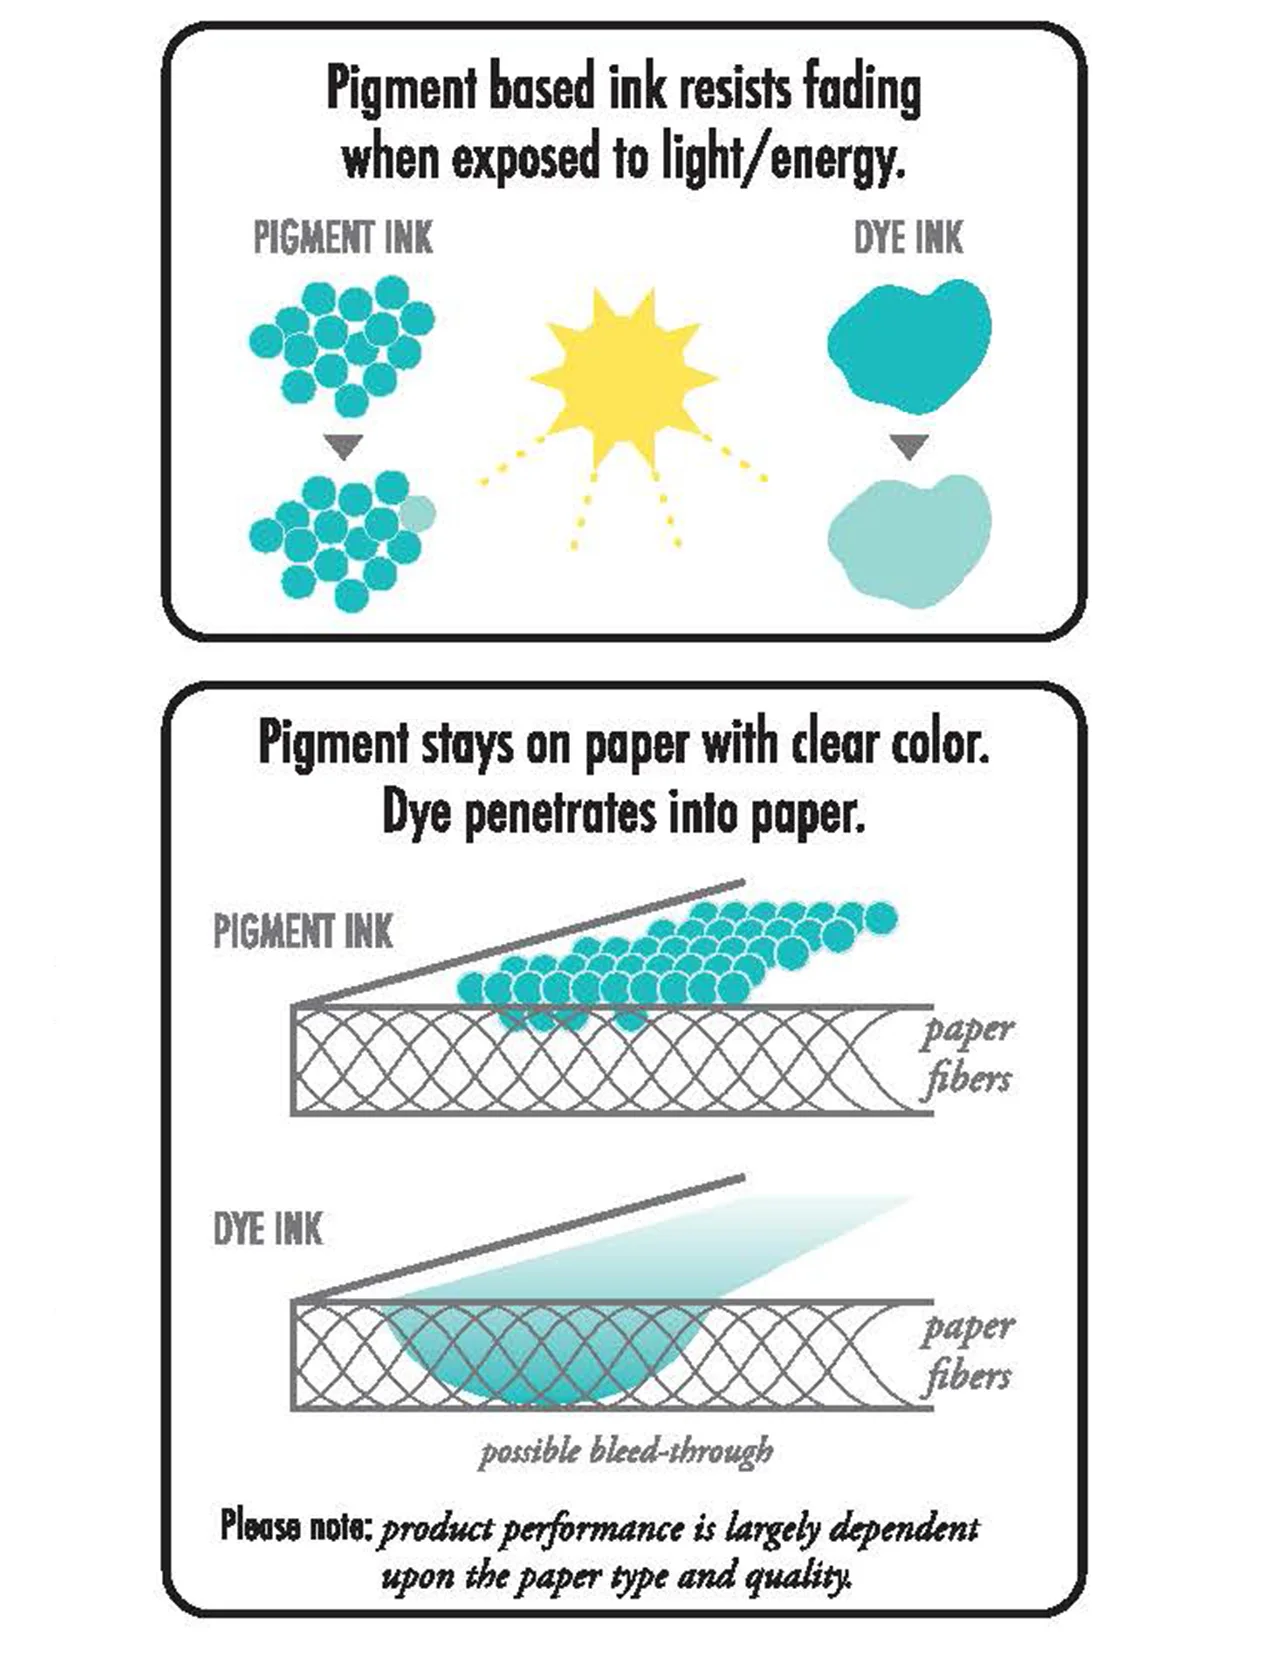
Pigment based ink vs. dye based ink
In the early 80’s there was a need to develop writing instruments using superior, stable pigment based inks, rather than the dye based inks used in most pens at the time.
Pigment molecules are 100 times bigger and more chemically complex than dye molecules, and are inherently longer lasting; therefore, less susceptible to UV rays, chemical degradation, pollution from contact with oils and other chemicals on papers, etc.
The illustrations to the left point out key differences between pigment and dye base inks and why pigment inks are superior for highlighting and underlining on Bible paper.
Using single color pigments eliminates separation, which translates to less fading and changing of color over time
The ink dries to a neutral pH, neither acidic nor alkaline, which protects the paper on which it is used
Waterproof resins make it universally compatible with other media such as watercolors, oils, and acrylic paints once dry
The tiny pigment particles remain stable within the water-based solvent, promoting color shade consistency and smooth ink flow
This is why GTL requires all of our products to have pigment base inks.
Please note: product performance is largely dependent upon the paper type and quality.
benefits of marking the bible
Over 30,000 verses grace the 66 books of the Bible. To say the Bible is complex is an understatement. Highlighting or underlining important parts of the text helps control this complexity. Marking special areas of interest or passages for personal enjoyment is a good way to locate, index and visually track important themes and topics. Adding personal comments in the margins next to a special verse personalizes your reading.
Benefits of Color Coding the Bible
- Slows your reading down so that you see word relationships
- Helps trace ideas through a text more easily
- See an idea in its context more clearly
- Identify significant words
- Discover relationships between sentences, paragraphs, chapters, and Books of the Bible
- Discover Biblical cross references to other verses more easily
- Increases your ability to memorize and recall Biblical passages
- Helps you focus more on the Biblical text rather than commentaries
- Keeps you focused on verse to verse study rather then jumping around
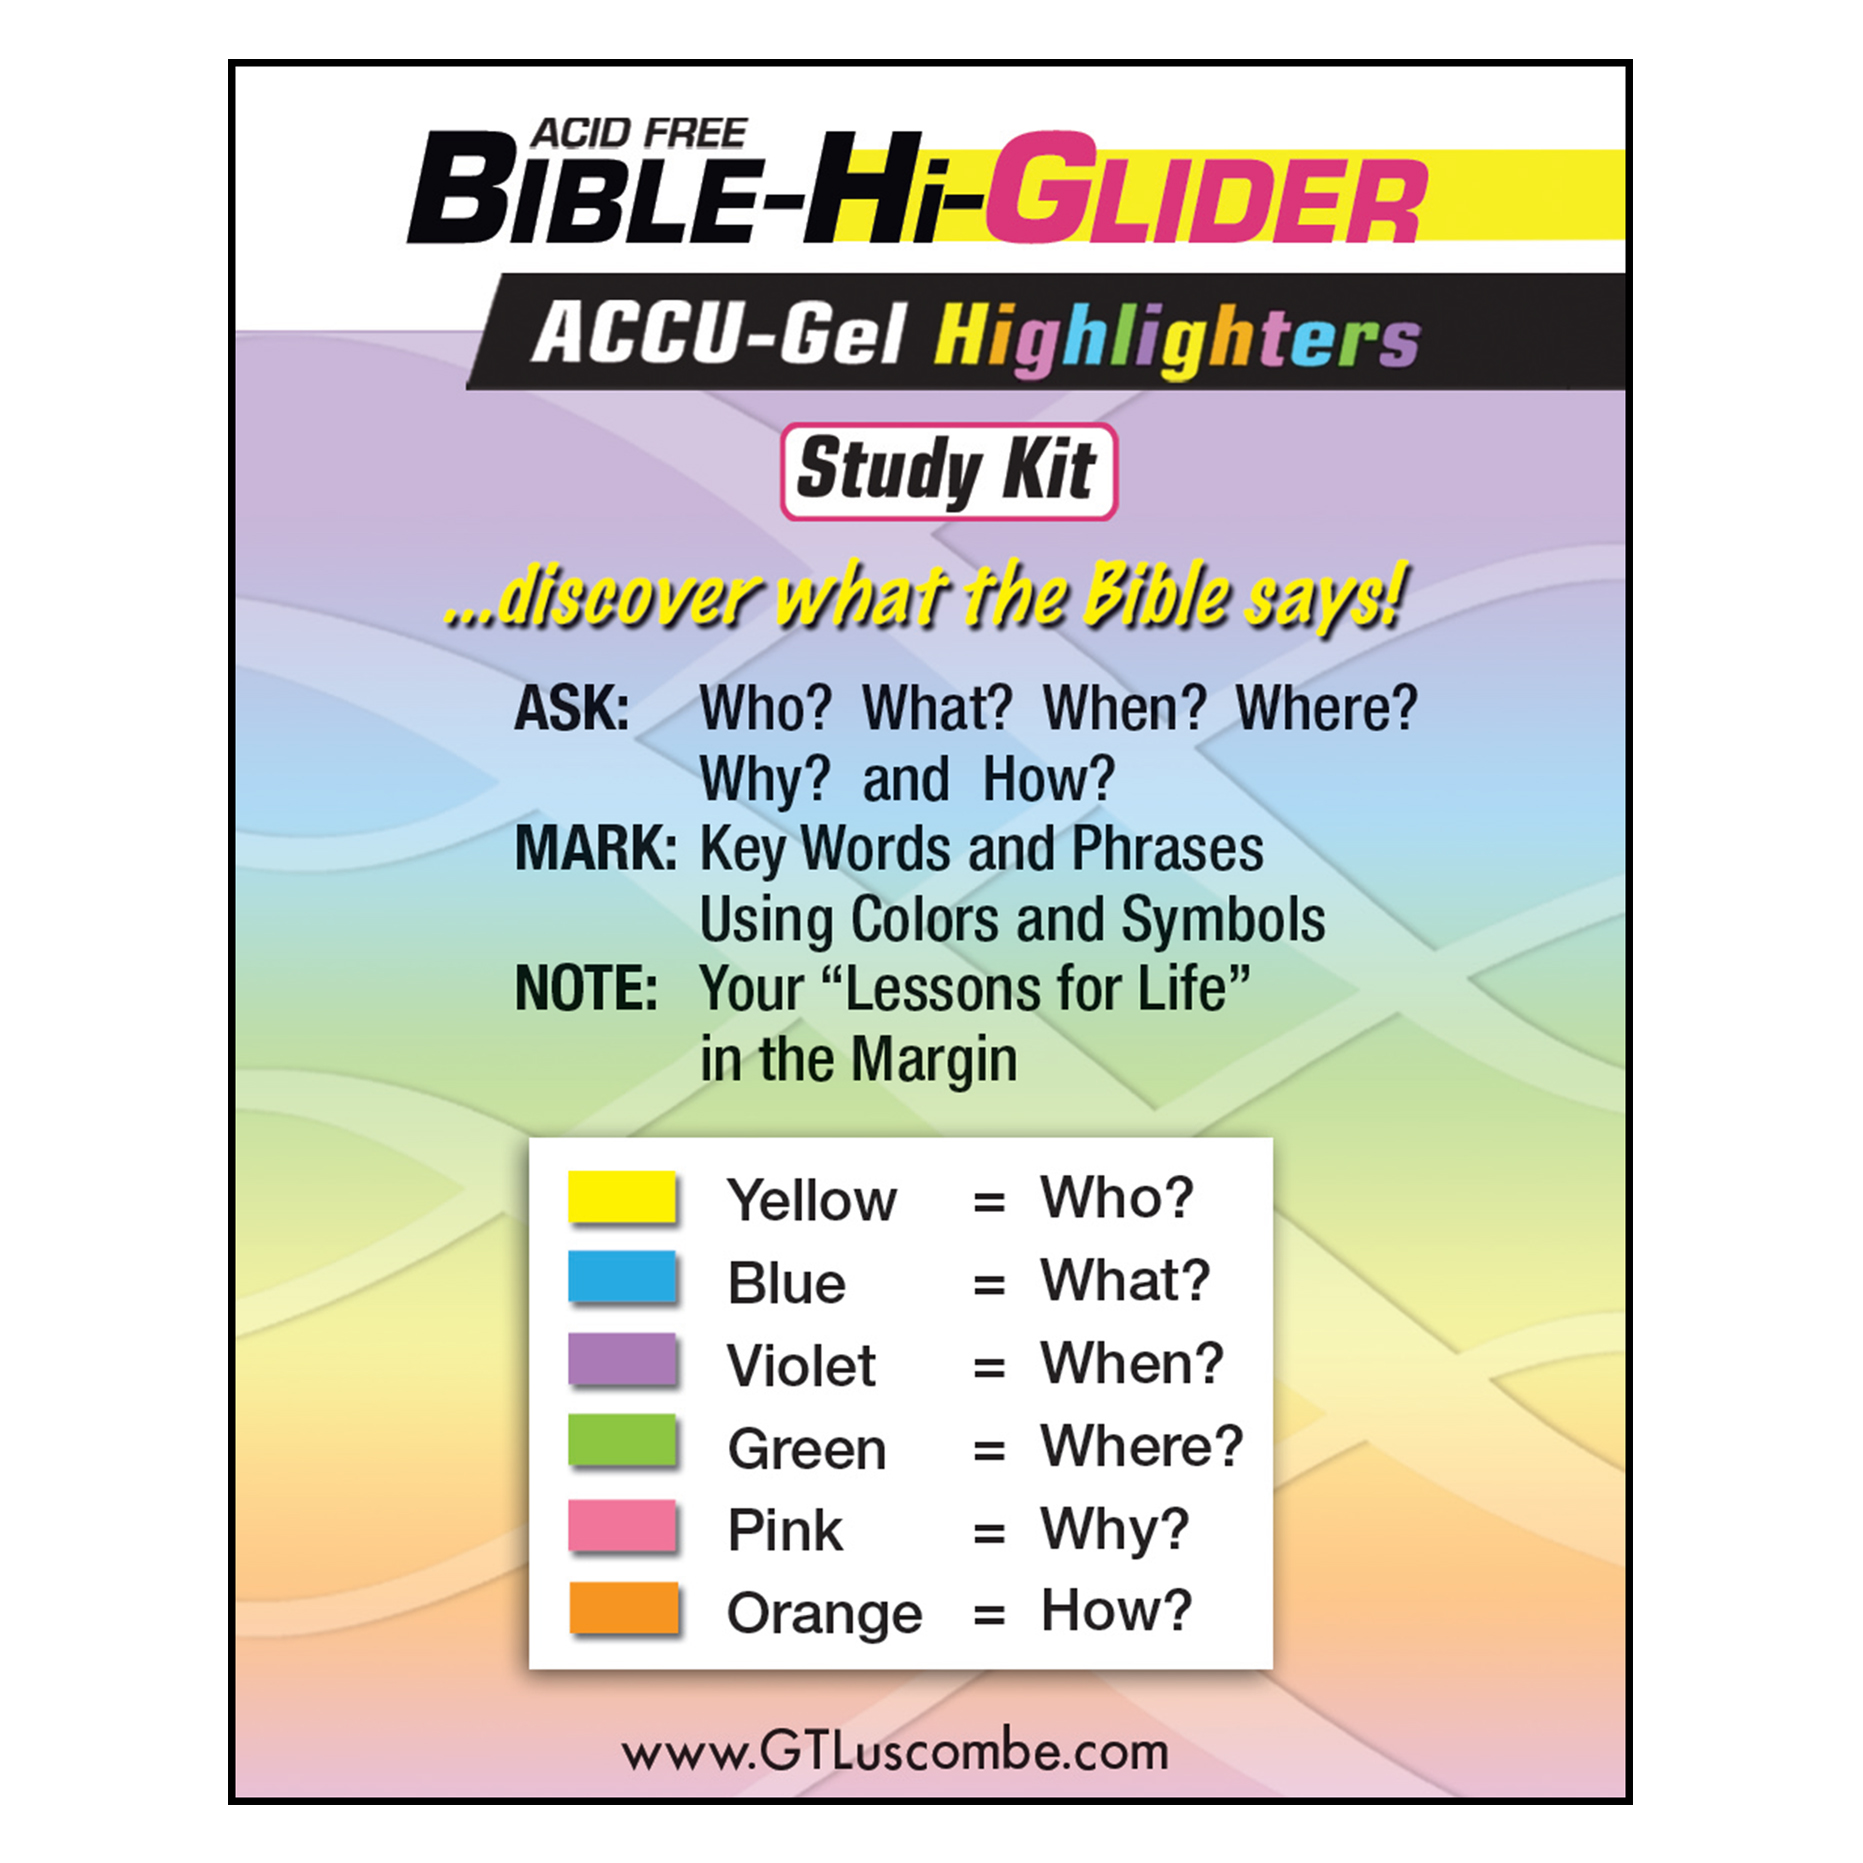
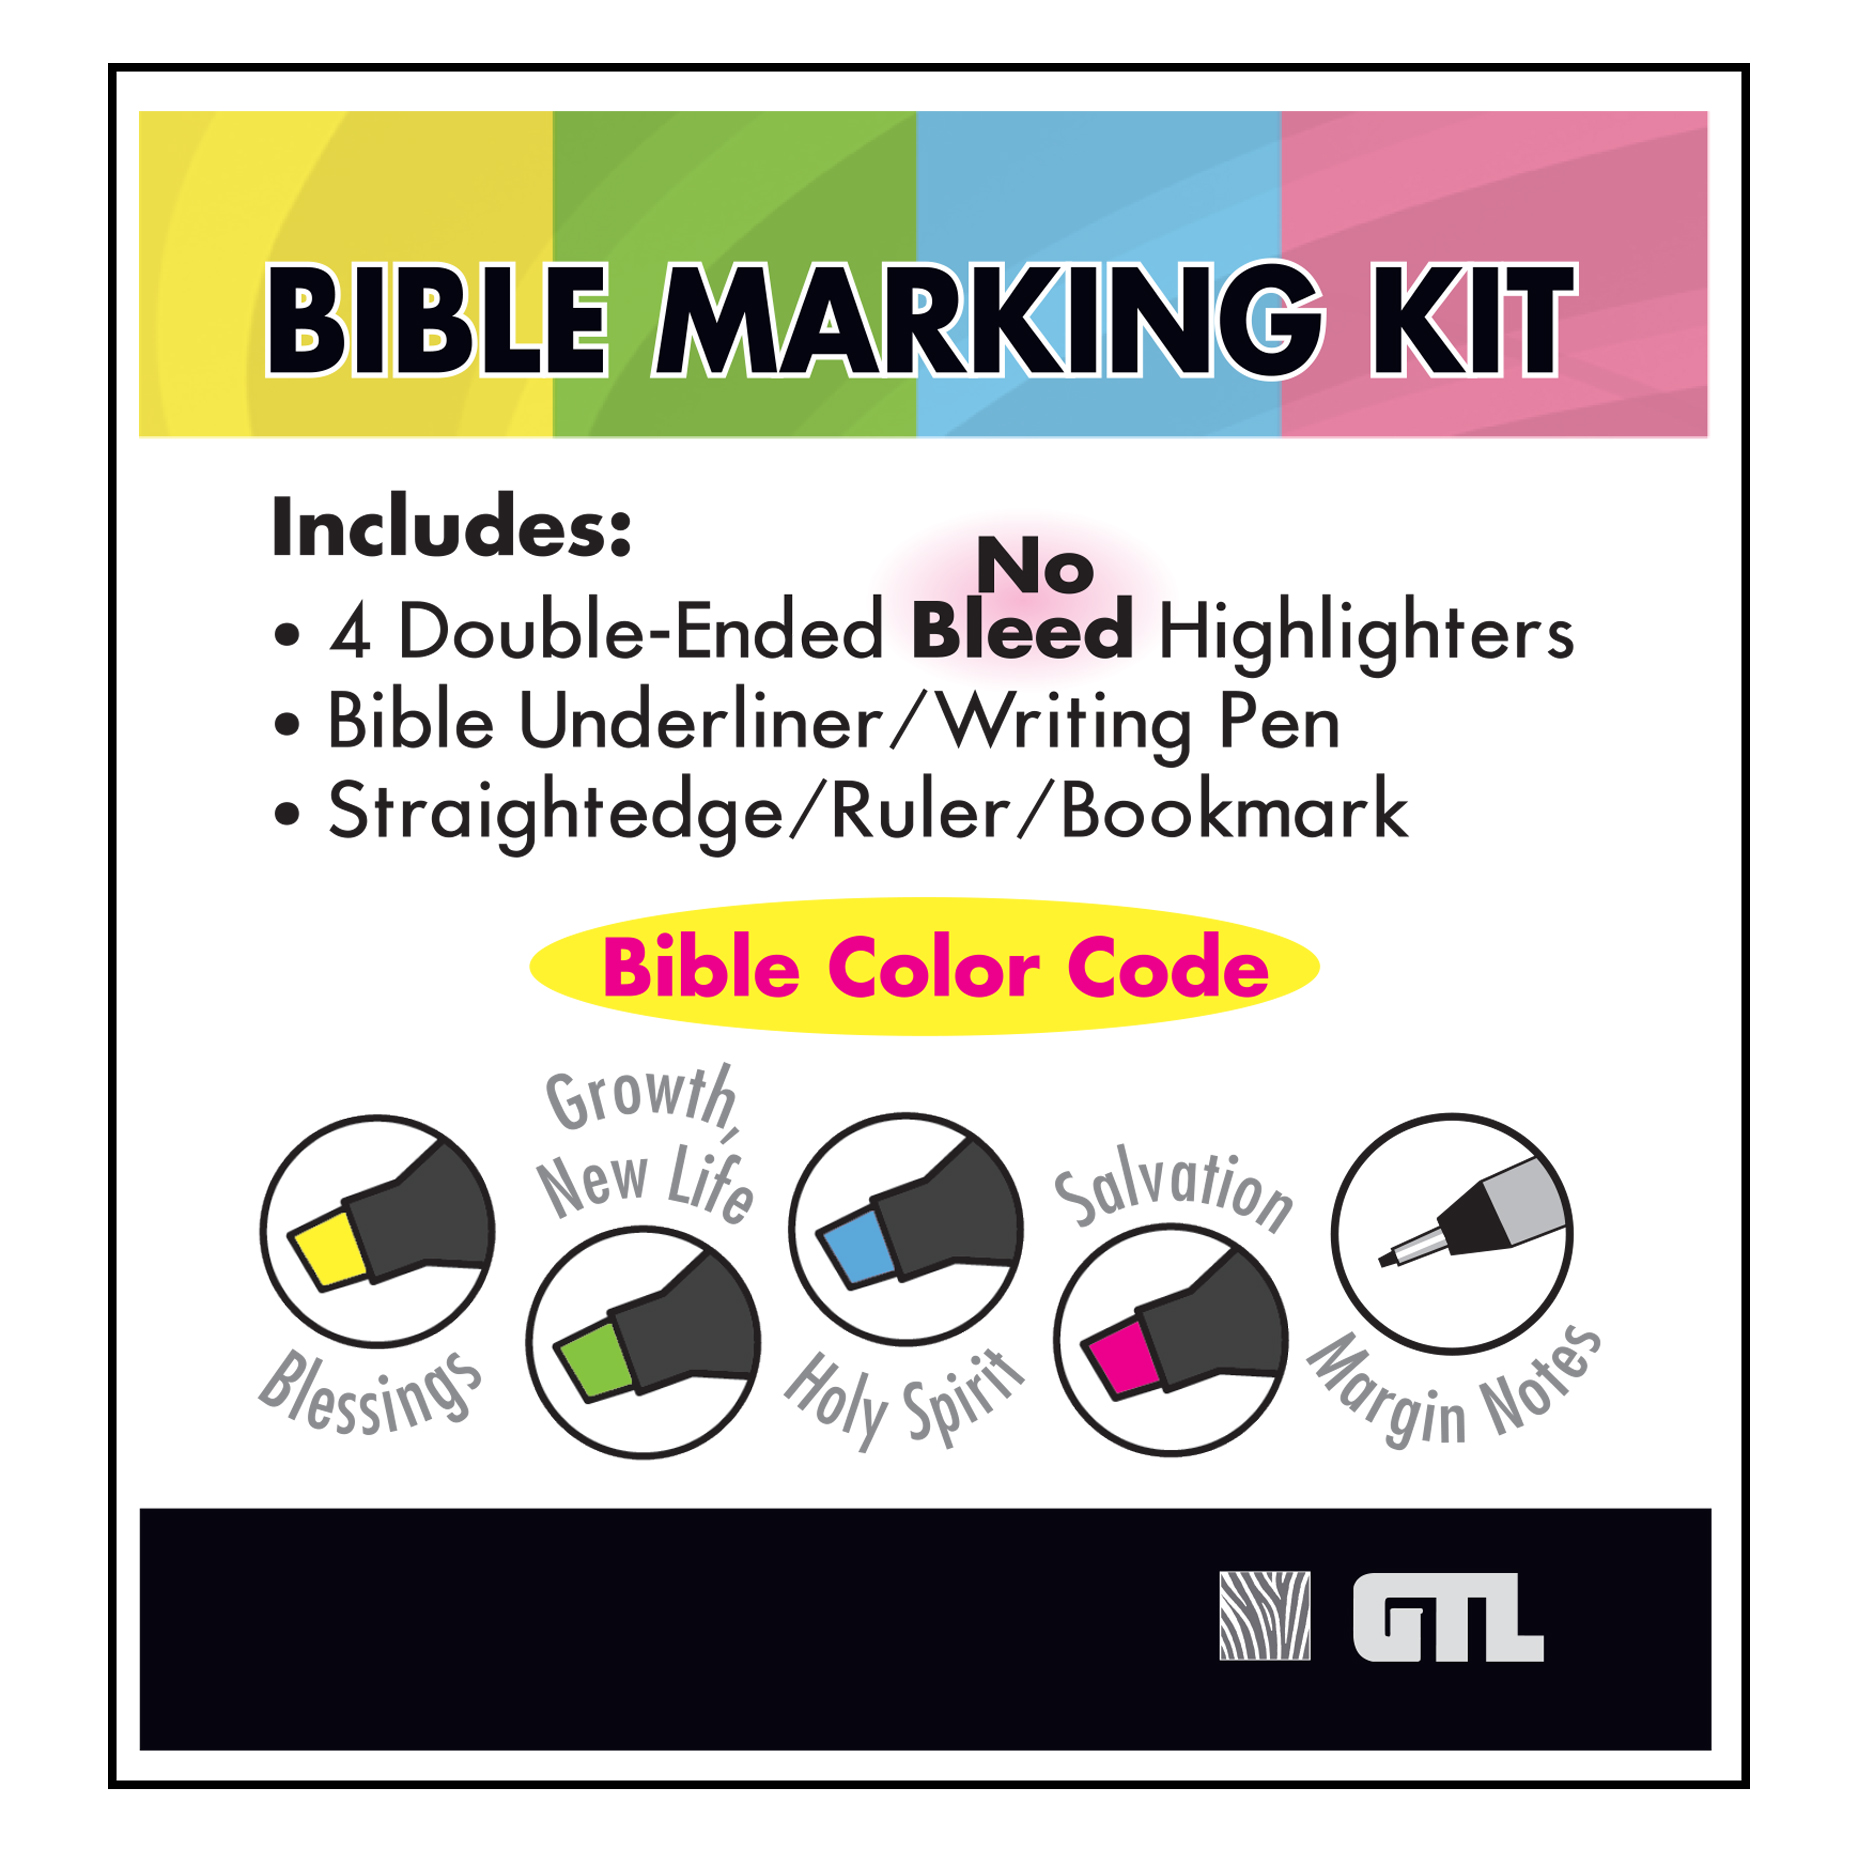
Basic Color Coding
GTL offers a variety of Bible Study Marking Kits which aid in Bible Study. All of these kits include a basic color code on the packaging which provides a solid template to begin your studies.
Other Color Coding Ideas
- Look for a word and its personal pronouns
- Look for synonyms
- Look for repeated words
- Color code verbs
- Look for purpose statements ("so that" "for this reason")
- Look for time ("after this", "then")
- Look for contrasts ("but", "or")
- Look for conjunctions ("and")
- Look for transitions ("therefore")
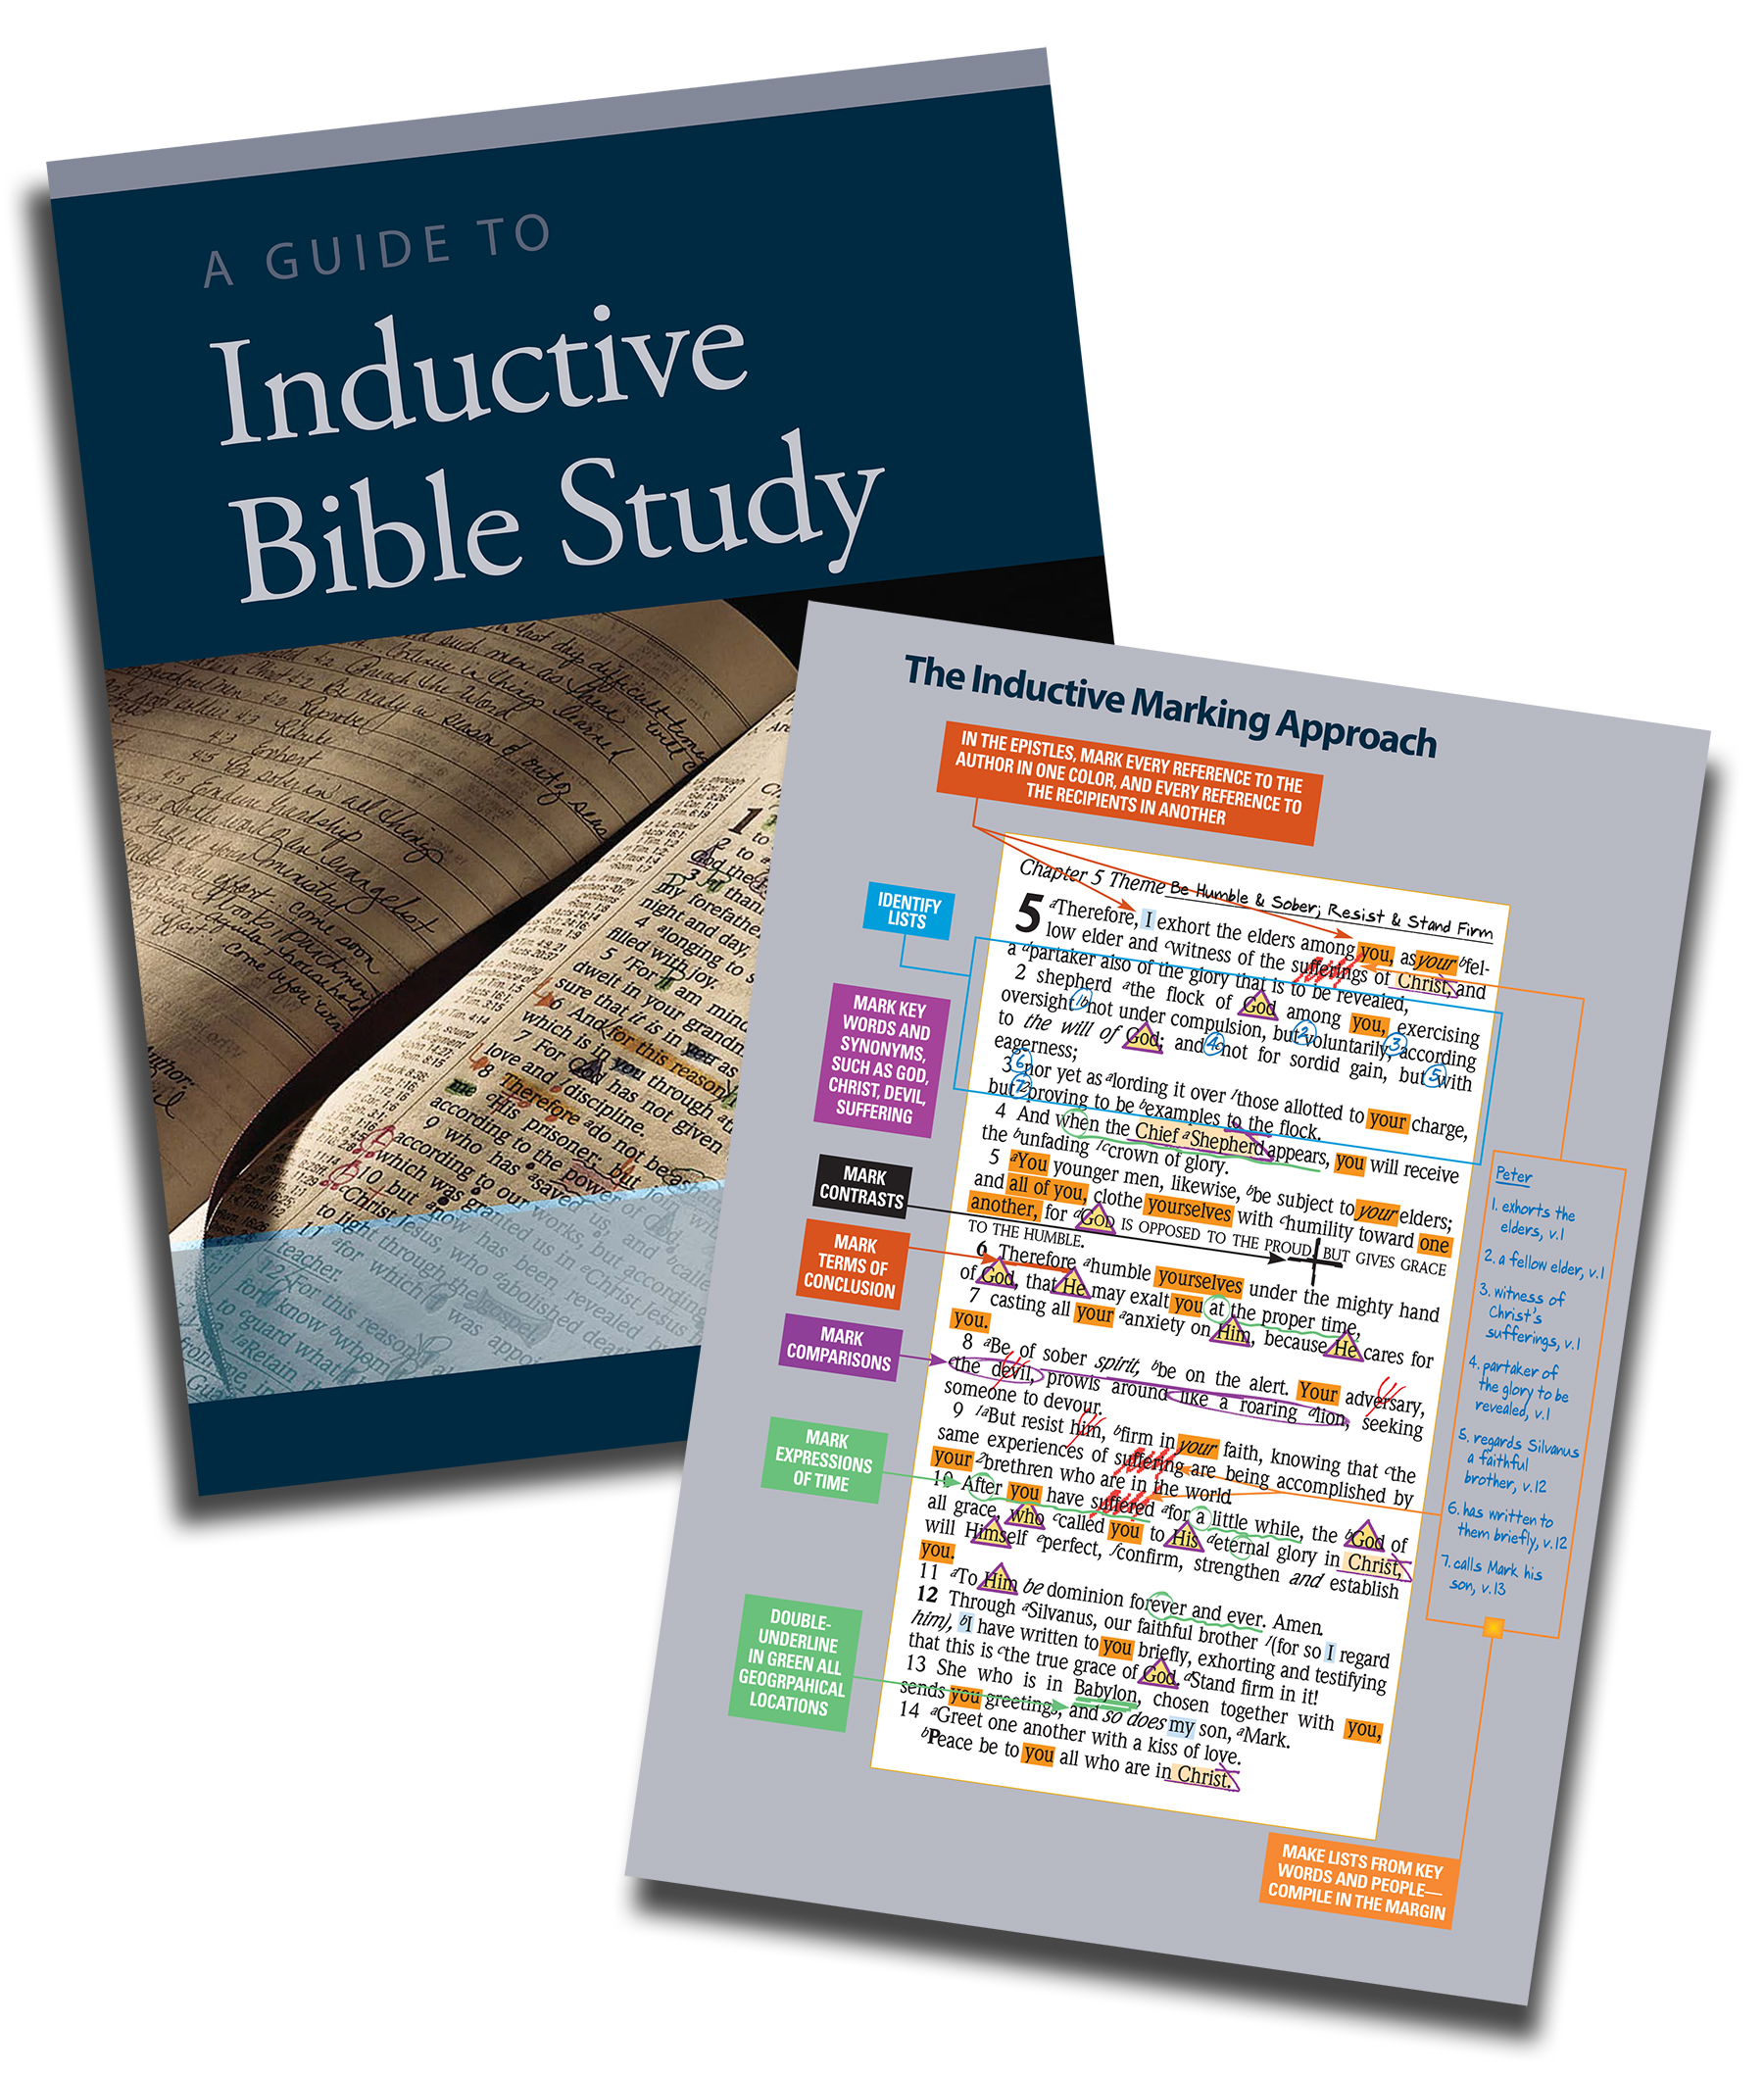

guide to inductive bible study
God's eternal, inerrant Word is your guidebook for all of life, and inductive study gives you the key to understanding that guide. Inductive Study, a method that brings you directly to the Word of God apart from another's understanding or interpretation of the text, involves three skill: Observation, Interpretation, and Application.
Observation: discover what it says
1. Begin with prayer
2. Ask the "5 W's and an H", Who? What? When? Where? Why? How?
3. Mark key words and phrases
4. Make lists
5. Watch for contrasts and comparisons
6. Note expressions of time
7. Geographic locations
8. Mark terms of conclusion
9. Identify chapter themes
Interpretation: discover what it means
1. Remember that context rules
2. Always seek the full counsel of the Word of God
3. Remember that Scripture will never contradict Scripture
4. Don't base your convictions on an obscure passage of Scripture
5. Interpret Scripture literally
6. Look for the single meaning of the passage
Application: discover how it works
The first step in application is to find out what the Word of God says on any particular subject through accurate observation and correct interpretation of the text. Once you understand what the Word of God teaches, you are then obligated before God to accept that truth and to live by it.
**check out Precept Ministries "Guide to Inductive Study" for additional information**

What's in our bible journaling kits?
Check out our "Unboxing" videos on G.T. Luscombe's YouTube channel. Watch as Jann Gray explains the products that make up each of our Best-Selling Bible Journaling Kits. She focuses on how to use them including tips and techniques to help even the most inexperienced journalers create beautiful pages.
#23450 - Foundations Bible Journaling Kit - Unboxing Video
#23560 - Foundations Upgrade Kit - Unboxing Video
#23562 - Foundations Upgrade Kit v2 - Unboxing Video
#24680 - Metallic Trends Bible Journaling Kit - Unboxing Video
#34560 - Deluxe Bible Journaling Kit - Unboxing Video
**For more on our Journaling kits check out "Kits" section under Illuminated Journaling**


benefits to hosting a bible journaling event
Why should my bookstore host a Bible Journaling workshop?
Quite simply, it introduces and supports Bible journaling to your customers and community like nothing else will. If you have not introduced this product line yet, then what a great way to launch the Bible journaling concept and products! If you have already made an initial purchase of Bible journaling products, then an event or workshop is perfect to "kick-start" the buzz in your community.
The most obvious reason though, is the financial benefit to your store when you capture this growing revenue stream and increase your customer base.
What does a workshop look like?
Every event is inherently different, depending on your goals and the level of journaling experience the participants have, but there are a few things that are common to every workshop.
1. Start off by emphasizing that Bible Journaling is more about "your heart, than the art"
2. Teach a technique that is appropriate to the participants skill levels
3. Introduce the participants to the journaling products you carry in your store
4. Lead a devotional and then walk the participants through the process of journaling their response
Bible journaling may have been the best kept secret in Christian retail, but the secret is OUT... and why not join the other successes?
**check out the flier for additional information on scheduling, class options, how to host an event, and Jann Gray**

How to use One & Done Art Transfer Sheets
Trace Once and You're Done! Even though they're called "One and Done" you can use them again and again. Jann Gray developed a quick and simple way to transfer line art to your Bible pages. Simply trace pre-printed graphics from Jann's personal collection. Pick your favorite design from our collection featuring Botanicals, Icons of Faith, Favorites, Stones of Remembrance, and Favorites 2.
How do they work?
1. Choose desired line art
2. Position graphite sheet on Bible page
3. Place line art on graphite sheet and trace using bamboo stylus provided
4. Remove to reveal transferred art
5. Add color and detail using other GTL mixed medias like Pigma Microns/Gelly Rolls, colored pencils, watercolor and acrylic paints, Gelatos and much more!
For more on our One & Done's check out "Transfer Art" section under Illuminated Journaling.
**check out our YouTube One & Done tutorial videos**

**Our Manufacturer guarantees complete customer satisfaction & replacement. Check out Pentel's complete warranty for details.**
How to refill Pentel 8 Colors pencil
1. Rotate Pentel 8 Colors Pencil, "Refill" indicator on yellow lead advance knob to arrow mark on top of the clip
2. Push down lead advance knob to open chuck allowing lead to be inserted or removed
3. Be sure "Refill" indicator mark is pointed away from clip to prevent lead from dropping completely out of the pencil
Damaged leads or other leads of different diameter or length can cause damage to your pencil
**check out manufacturer's instruction manual for additional information**

**Our Manufacturer guarantees complete customer satisfaction & replacement. Check out Sakura's complete warranty for details.**
WHY IS MY PIGMA MICRON PEN LEAKING?
A leak near the nib holder or ink wick of a Pigma Micron could be caused by dropping, inadvertently shaking, or accidentally applying centrifugal force to the pen by spinning it in your hand.
The source of a leaking Pigma Micron is the air vent collar located just below the silver tip of the pen. Under normal use, the air flows into the barrel through the vent area. The equalized pressure allows the ink to flow through the microscopic nib structure via capillary action. However, when the pen is unconsciously waved, tapped or spun in your hand while capped, the centrifugal force can cause the ink to come out of the air vent, which is the path of least resistance.
Most people are unaware that they have used the pen as an outlet for nervous energy. We’ve seen people use their pen as a drum stick, wave it in their hand or use it as a pointer while talking, tap the pen on their desk while on the phone, unconsciously spin it in their hand, and swing it in their purses and backpacks.
Centrifugal force can also be applied to the pen during shipping. The performance characteristics of Pigma ink require a special ink delivery system within the nib, but the trade off is that the Pigma Micron has to be handled more carefully than an ordinary ball point pen.
**check out the downloadable flier for additional information**
**Our Manufacturer guarantees complete customer satisfaction & replacement. Check out Sakura's complete warranty for details.**
Why does my Pigma Micron pen run out of ink?
Simple answer - because they are loved and used so frequently!
The average write out length of the Pigma Micron 01 (.25 mm line) is 800 meters. The wider the line width, the lower the write-out length. So here are some general (approximate) length write-outs for the black ink:
a. Write-out is very dependent upon the type of paper used, e.g., cotton fiber papers absorb a lot more ink from the Micron nib than papers such as #20 lb. copier paper (which have a lot of clay content and are therefore less absorbent).
b. Write-out is affected by the "cap-off time," i.e., how long the cap is left off the pen when it is not being used.
c. Nib blockage affects write-out, so make sure your paper surface is clean and smooth.
d. Some people try to treat the acidity of their paper by adding calcium carbonate. If they don't fully dilute the powder some of the particles may clog the Micron nibs.

**Our Manufacturer guarantees complete customer satisfaction & replacement. Check out Sakura's complete warranty for details.**
How to prevent pigma microns from bleeding/Smearing when using rulers
Pigma Micron, a technical pen used by architects and engineers to make fine lines with a constant width, can create a “bleeding effect” if the wet Pigma ink comes into contact with the underside edge of the ruler. Most plastic and metal rulers are flat which causes the ink to migrate to the underside of the ruler when the Micron’s nib comes into contact with the ruler’s edge. To prevent this bleeding effect, raise the ruler to a height so that its edge runs along the metal shaft of the Micron Pen. If raising the ruler while writing becomes a challenge, tape some pennies to the back of the ruler. This was a popular workaround used by many college architects in the 1980’s and 1990’s.
The most efficient solution to prevent the Micron pen from bleeding is to use an “inking ruler.” An inking ruler which is usually made out of aluminum, steel or metal, is designed with a backing that raises the edge off the surface of the paper. The raised backing prevents the nib from touching the ruler and thus prevents bleeding.
So let's see some lines! Below describes how the lines in the image to the left were created.
Line A - was inked with the ruler flat against the paper, letting the ink bleed under the edge. When the line is done and the ruler is then moved, it drags the ink with it making a big ugly smear.
Line B - attempts to minimize the smearing by lifting the ruler straight up from the paper, but the bleeding still fattens and slops the line.
Line C - was inked with a Speedball C-6 nib and the beveled ruler flipped over, giving a sharp clean line ideal for panel borders.
Line D - was inked with a brush, attempting to keep it as even as possible. Even then, you can see subtle variations in line weight, which gives the entire line some humanity.
Line E - was inked with a brush and I wiggled my hand quite a bit for a worn ragged effect.
**check out "Inking a Straight Line" article for additional information**
**Our Manufacturer guarantees complete customer satisfaction & replacement. Check out Sakura's complete warranty for details.**
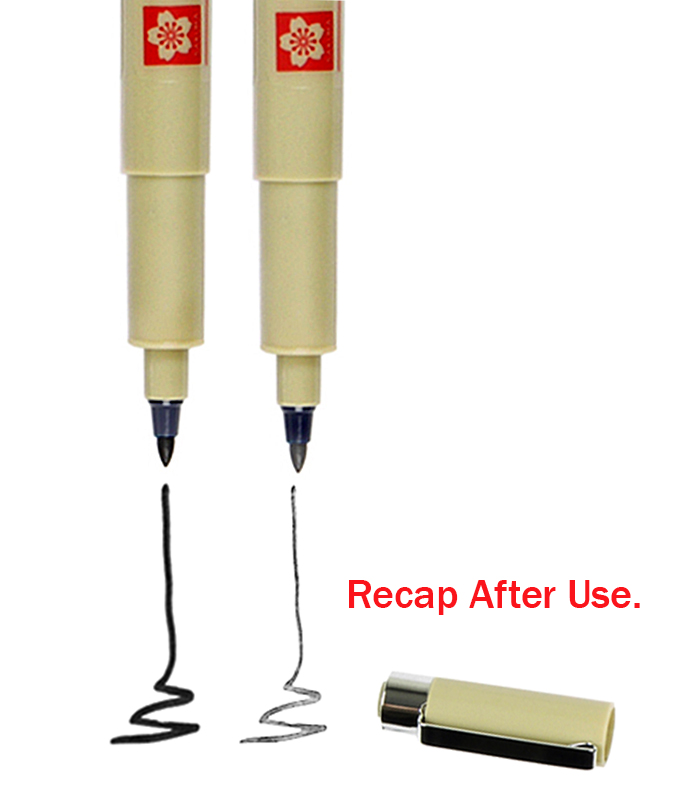
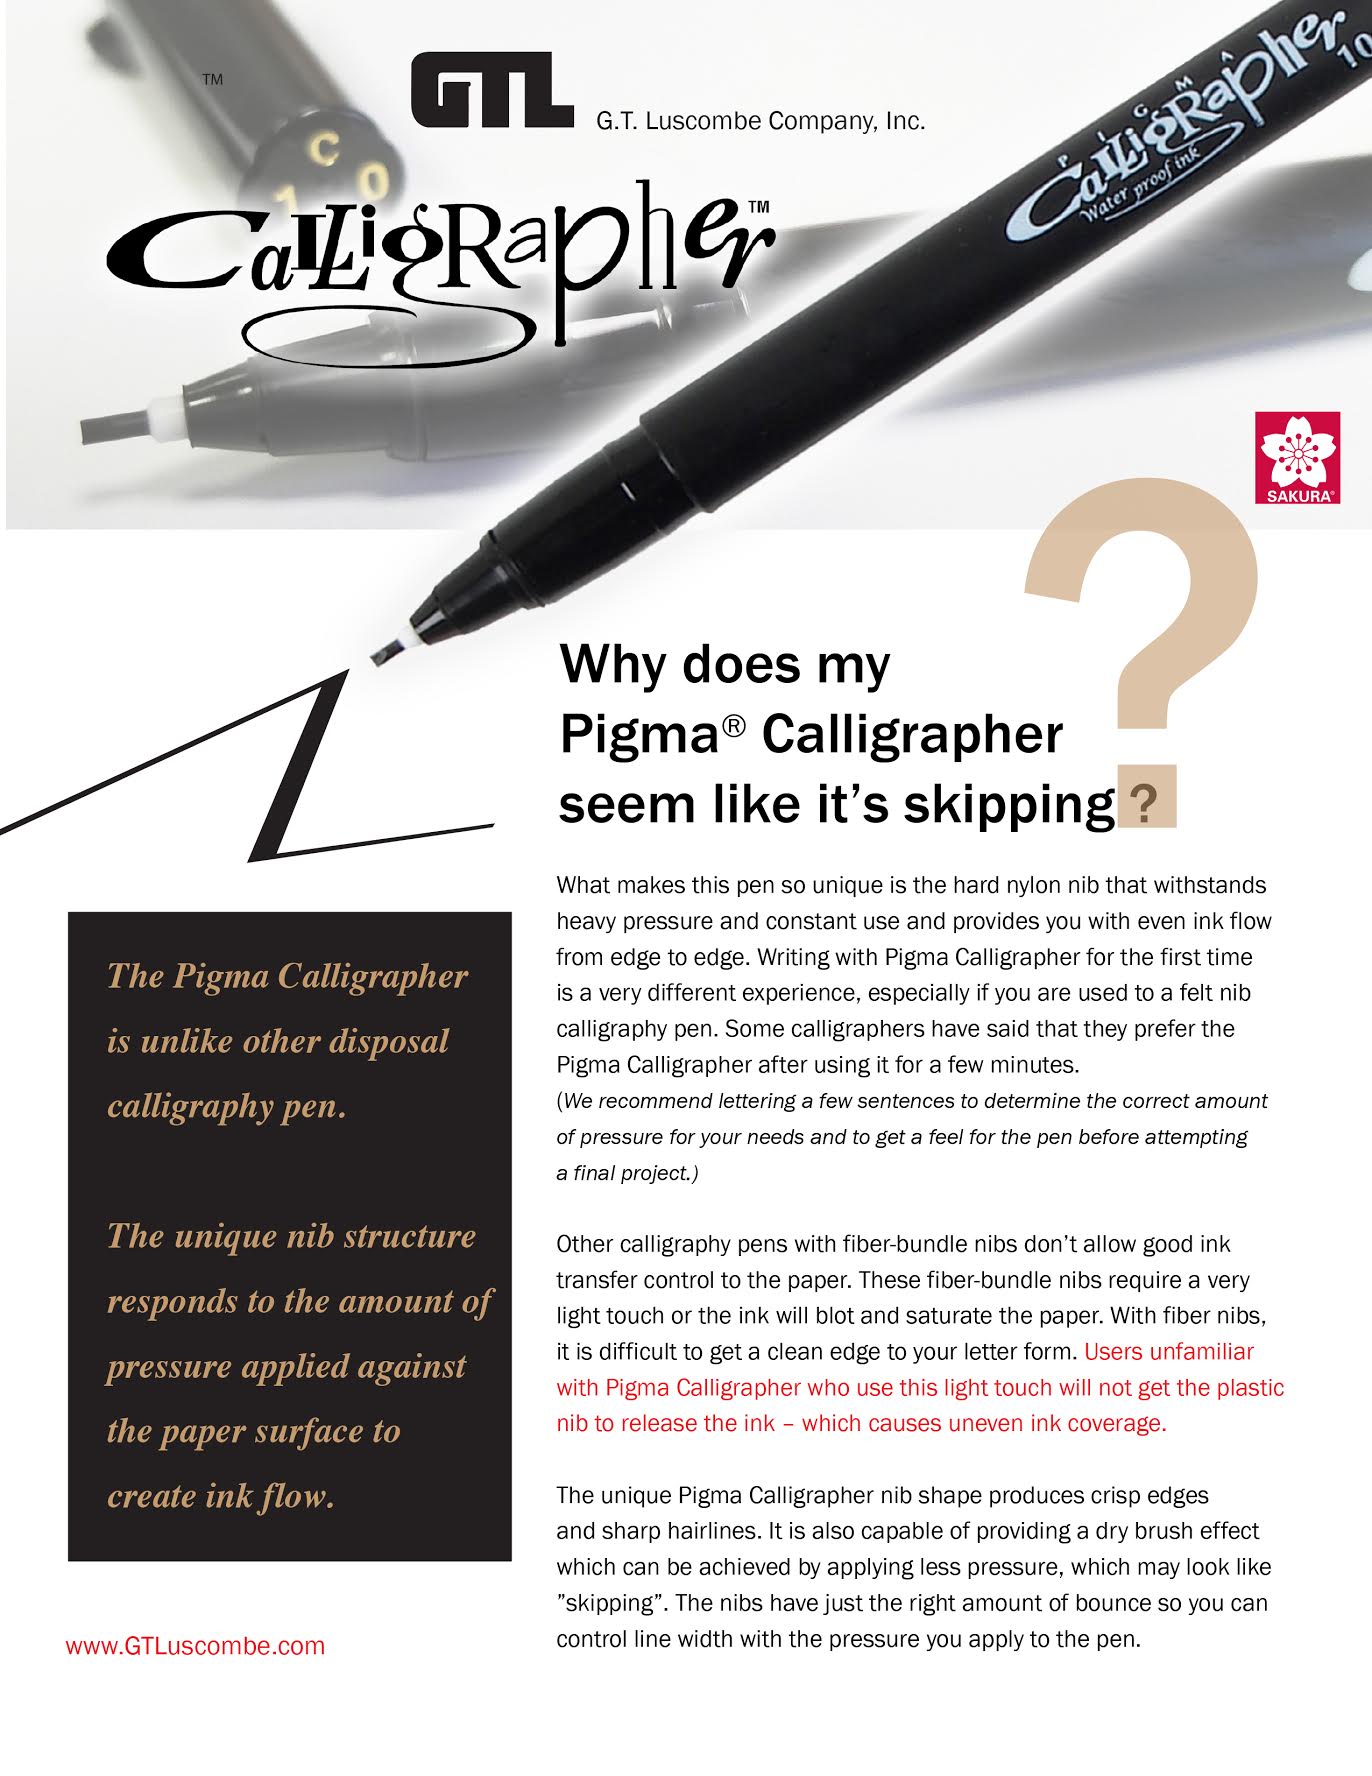
why is my pigma calligrapher "skipping"?
What makes this pen so unique is the hard nylon nib that withstands heavy pressure and constant use and provides you with even ink flow from edge to edge. Writing with Pigma Calligrapher for the first time is a very different experience, especially if you are used to a felt nib calligraphy pen. Some calligraphers have said that they prefer the Pigma Calligrapher after using it for a few minutes. (We recommend lettering a few sentences to determine the correct amount of pressure for your needs and to get a feel for the pen before attempting a final project.)
Other calligraphy pens with fiber-bundle nibs don’t allow good ink transfer control to the paper. These fiber-bundle nibs require a very light touch or the ink will blot and saturate the paper. With fiber nibs, it is difficult to get a clean edge to your letter form. Users unfamiliar with Pigma Calligrapher who use this light touch will not get the plastic nib to release the ink – which causes uneven ink coverage.
The unique Pigma Calligrapher nib shape produces crisp edges and sharp hairlines. It is also capable of providing a dry brush effect which can be achieved by applying less pressure, which may look like ”skipping”. The nibs have just the right amount of bounce so you can control line width with the pressure you apply to the pen.
**check out the downloadable flier for additional information**

It's All about the paper sizing...
Ever wonder why paper towels excel at soaking up the red wine you spilled, where the pile of junk mail would fail miserably?
Okay - maybe you have, or maybe you haven't. In any case, it's all about the sizing. Without sizing, paper tends to soak up anything liquid. For instance, ink will bleed or feather, immediately soaking into the paper. With sizing added, both ink and wine will sit on the top surface of the paper. Line edges are drastically crisper on the sized paper. Sized paper is generally tougher and stronger, as well.
Various types of sizing have been used through the ages and in different traditions. Also, the amount, type, and application of sizing is unique to each paper-maker and their handmade paper - experimentation in the studio and the intended purpose of the paper is key.
**check out the downloadable flier for additional information**